How do I review footage on the HDMI monitor?
Text guide:
Step 1:
The main screen on your monitor will show all of your active cameras giving a live view.
step 2:
First, right click anywhere on the screen, and a menu will appear, to start reviewing the footage click on the “search” option from that menu
Before moving to the next screen, your monitor will prompt you to enter the passcode you set up upon installing the NVR, once you enter it you will be taken to the playback screen
step 3:
The search page has a few things to go over
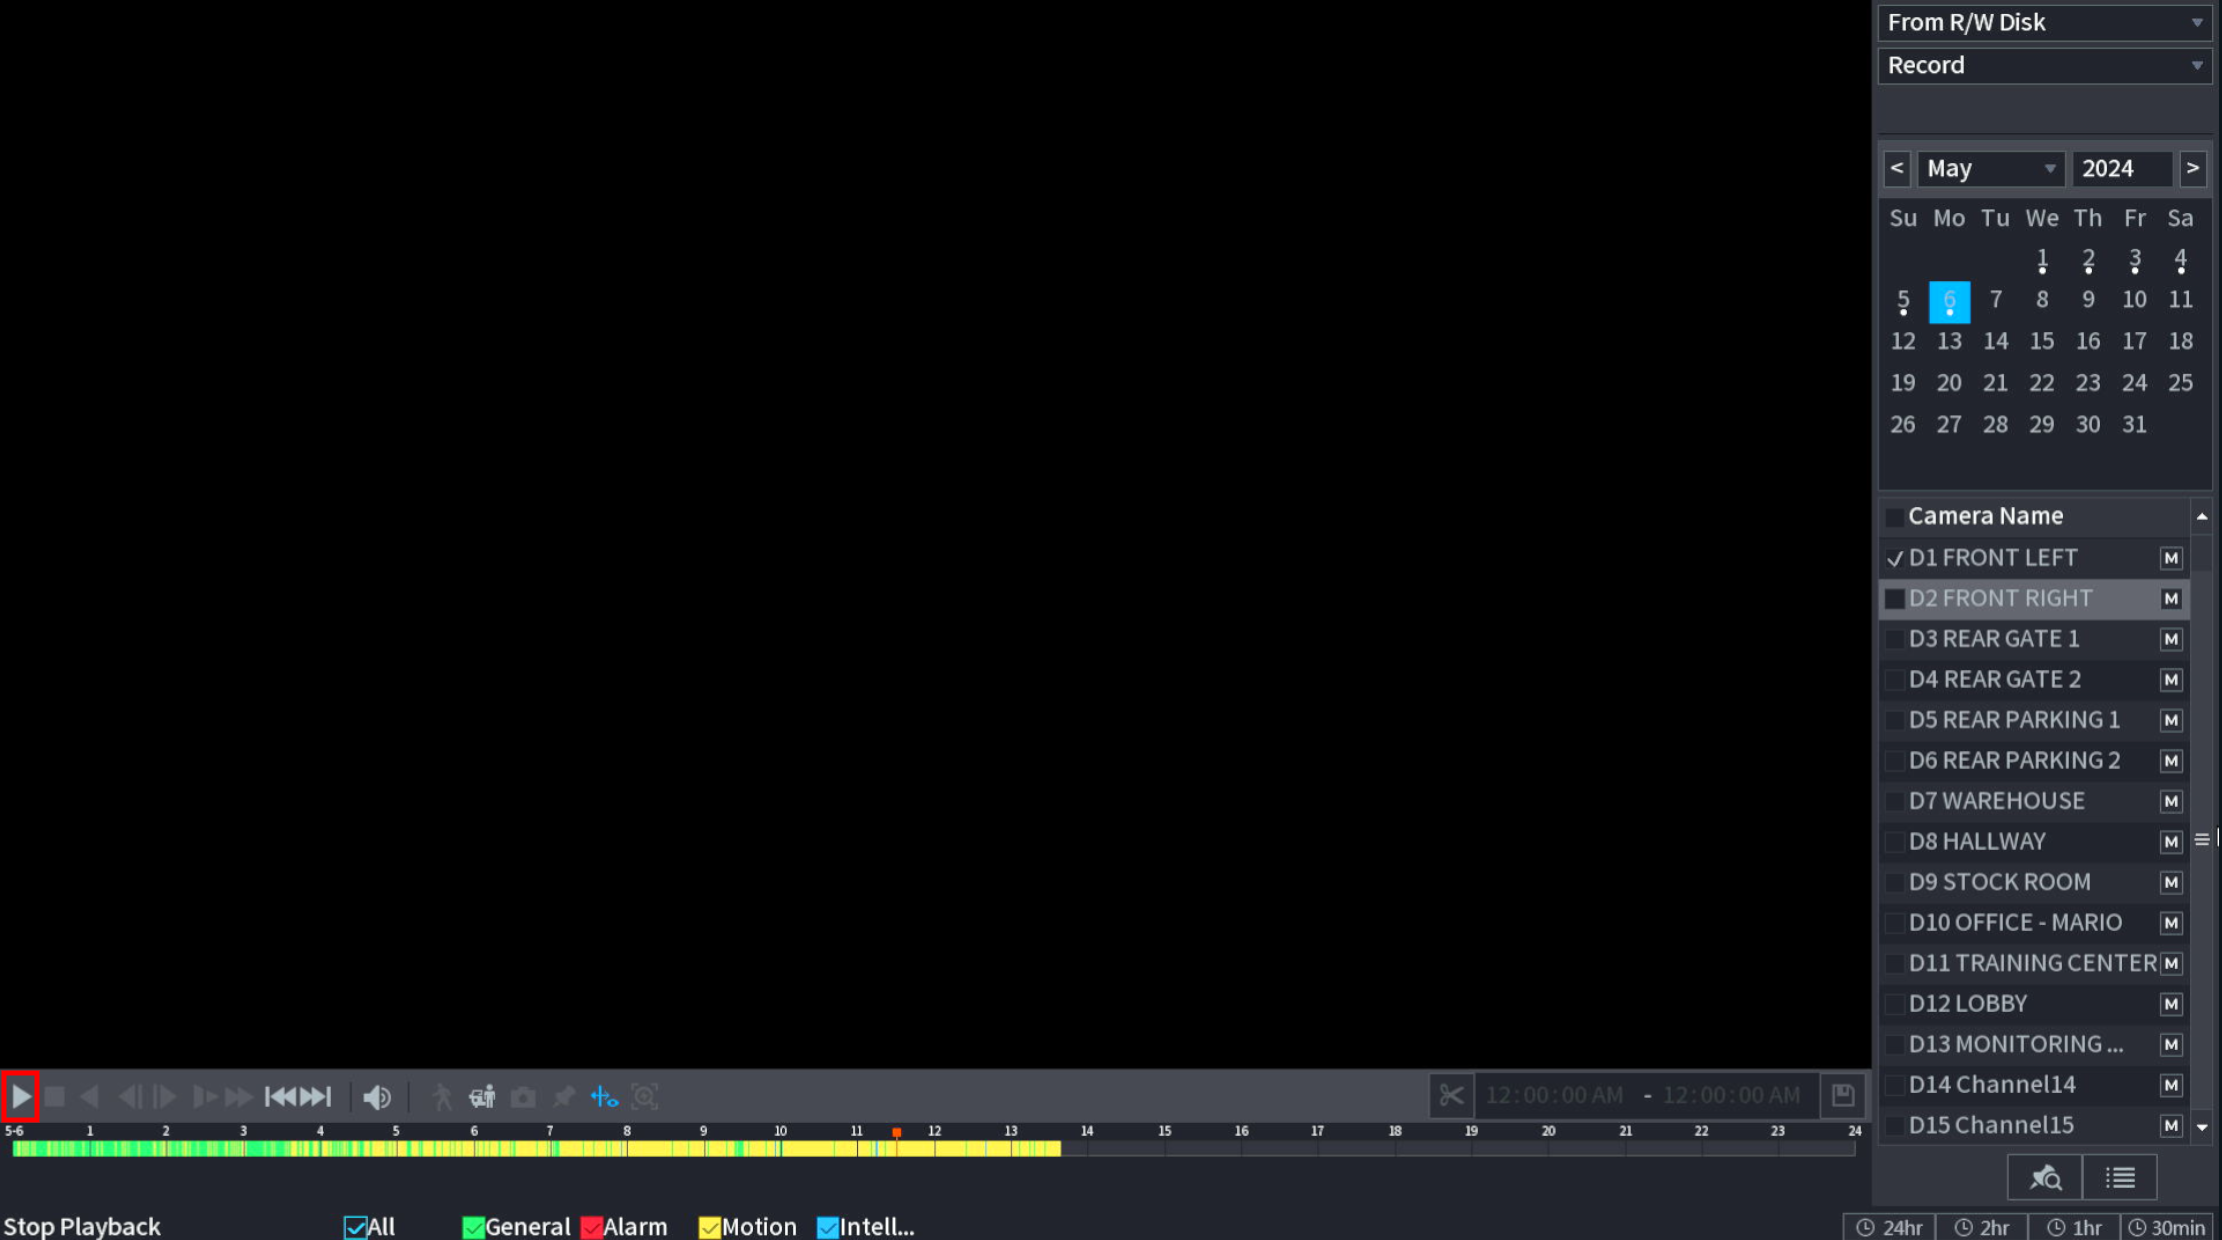
First is in the top right, this calendar will show you what date you are reviewing footage from, you can change month and year at the top, and you can see what day of the month you have selected indicated by the date highlighted blue.
Next, right below the calendar shows your currently selected cameras. By default you will have 4 cameras selected. You can see which cameras are selected by the checkmarks to the left of the camera names.
In the bottom left you will see the play button, hitting this will playback footage on all of your selected cameras.
Note: Camera playback is an intensive process so it is not recommended to playback more than 4 cameras at a time. If you notice any issues during playback such as video cutting out, you may want to lower the total number of cameras even more as well.
The bar below the playback is the timeline, your current place in the timeline is indicated by the orange marker you can currently see all the way to the left in the image below.
The final thing to go over is how to narrow your search when reviewing footage.
In the bottom right will be 4 buttons “24hr” “2hr” “1hr” and “30min”
by default the playback will be on 24hr, showing you the full 24 hours on the timeline below. The other options will make the timline show the next 2 hours, 1 hour, and 30 minutes respectively once you click them. The section of the timeline shown will start immediately after where you are on the timeline.


